BOTTOM LINE: With an hour or less of setup, you can be on your way to professional-quality email communication with your God’s Closet mailing list(s)–AND avoid legal jeopardy for privacy and spam violations.
As a non-profit organization, your God’s Closet chapter is subject to regulations like CAN-SPAM. This governs how you maintain and use your list of email contacts. Some of the most important factors are making sure that any messages sent to your list:
- Include required contact information for your organization
- Provide a means to unsubscribe and be removed from your list
- Do not allow any recipient to see the names or emails of other recipients (a potential privacy violation)
Free tools like MailerLite make it easy for you to communicate with everyone on your list, while meeting those and other legal requirements. In addition, you can…
- Manage multiple potentially overlapping groups, such as Shoppers, Volunteers, or Bible Study Interests.
- Use easy drag-and-drop tools to create colorful, eye-catching messages–and track how they are opened or read.
- Set up automated birthday greetings or reminder messages.
- Easily take surveys among your list members.
- Create forms that will let people sign up for your different groups via Facebook or your church website, using double-opt-in (BEST PRACTICE).
Don’t just get by with Outlook or Webmail; take your email communication to the next level!
In this post, we’ll walk you through how to set up a free MailerLite account to use for messaging your God’s Closet contacts, as well as automating the unsubscribe process, which is required by law.
Start by visiting www.mailerlite.com, and clicking the button to SIGN UP FOR FREE.
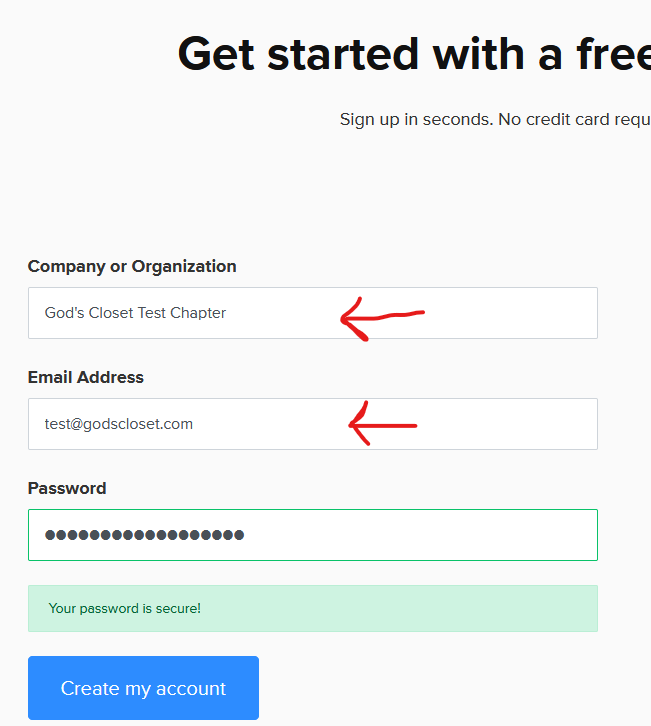
Sign up with your God’s Closet chapter name and email address as shown above, since that’s the address you want your group messages to come from. After you’ve created your account, click the button to COMPLETE PROFILE. Fill out the information on that page with your chapter’s contact information, and submit the form. Be sure to read the Anti-Spam Policy.
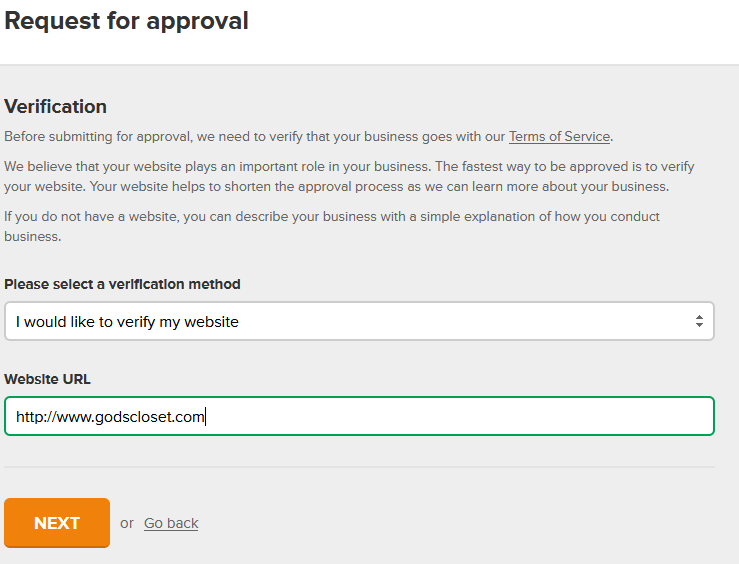
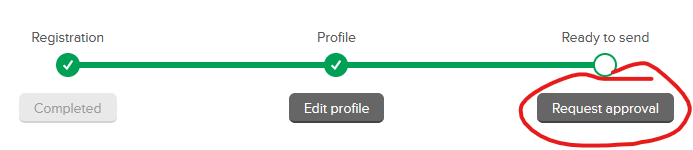
Next, click the button to REQUEST APPROVAL. This is where you verify that you have the right to send emails from your God’s Closet email address. Make sure to choose “I would like to verify my website,” and type in “www.godscloset.com.” The system will send you a message with an embedded link–look for it in the mailbox(es) where your chapter email gets sent. After you click the link in the confirmation message, you’ll see a green check mark in that third circle, and a notice that “Your account is currently being reviewed.”
While this is in process, you can start adding in your SUBSCRIBERS–look for the button in the green bar at the top. We recommend including a couple of staff emails for testing purposes. You can add your contacts in several different ways: Import from a spreadsheet, copy/paste, or add addresses one at a time. You may also wish to create one or more GROUPS (i.e. Shoppers, Volunteers, Staff, Bible Study Interests, etc.). The import process eliminates duplicates and checks for properly formatted emails.
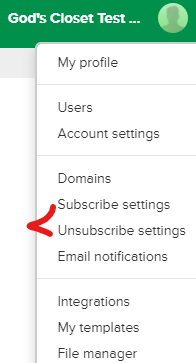
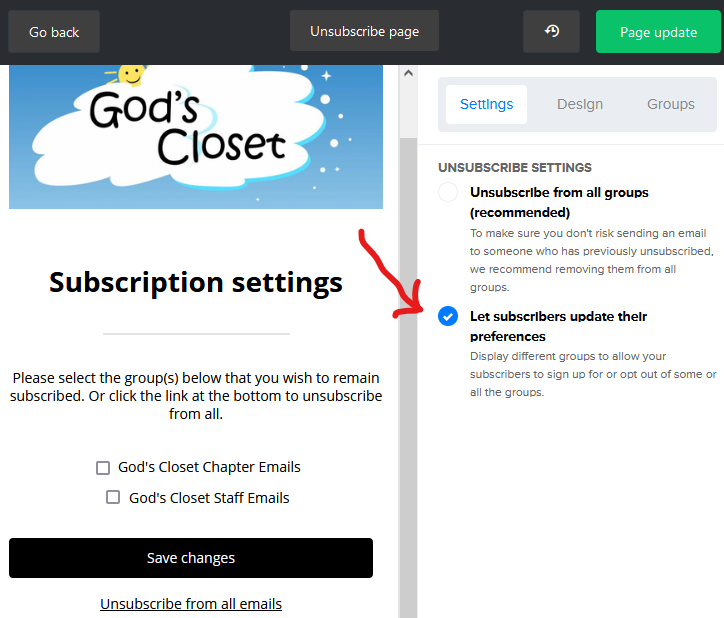
Once you’ve added some subscribers, you’ll want to customize your UNSUBSCRIBE settings before you send your first message. In addition to adding God’s Closet graphics, it’s a good idea to check the box to Let subscribers update their preferences. This will prevent subscribers from being automatically removed from your list when they click the link.
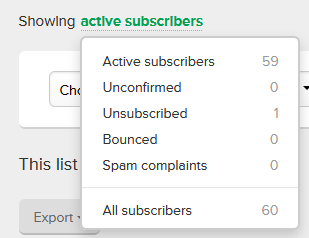
If someone does accidentally unsubscribe, you can edit their subscriber: click the ACTIVE SUBSCRIBERS link to show all of the subscriber categories. This also lets you see if any of the emails in your list have bounced or generated SPAM complaints.
Now you can start thinking about your first CAMPAIGN. (Each email you send to a group of subscribers is its own “campaign.”) Explore the different options for creating an email campaign:
- Drag-and-drop editor–great if you’re just getting started and really want to impress folks!
- Rich-text editor–considerably simpler, but still powerful, with most essential content blocks
- Legacy rich-text editor–includes options for styling and images; this one may be the best if you’ve never used a system like MailChimp before
- Custom HTML editor–for the coding experts
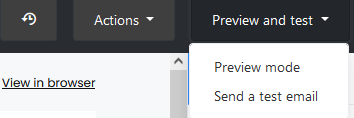
IMPORTANT: Always send a copy of your campaigns to yourself first as a test!
If your account is still awaiting review, take some time to check out the VIDEO TUTORIALS available for MailerLite. (If you’re doing this during normal business hours, approval should be pretty quick.) To check your status, click the DASHBOARD link at the top left of your screen. It will show when you’re ready to send your first message.
Please add your comments and questions below (must be logged in)–let us know what other information would be helpful for you as you’re using MailerLite.
Welcome, visitor!